My Natural Marigold Dreams Come True
This is a project I've been wanting to do for years, but my overthinking brain has been holding me back…until now! After much research and purchasing the supplies (over a year ago), I finally decided to just do it, because how else does one ever expect to progress?
I wrote myself this simple recipe to help me organize the overload of information I consumed:
Step 1: Scouring (1 hr, inactive)
-
Weigh cloth
-
Add 3% weight of fabric (WOF) neutral pH dish soap to a pot of hot water
-
Soak for 1 hour
-
Rinse in cool water
Step 2: Mordanting (2 hrs, inactive)
-
Fully dissolve 10% WOF alum in a pot of hot water
-
Submerge cloth and gently simmer for 2 hours
-
Rinse in cool water
Step 3: Dye Bath (1.5 hrs, mostly inactive)
-
Add marigolds to a pot of water, simmer for 30 minutes
-
Add prepared fabric, simmer very gently for 45-60 minutes
And that was all it took, simplifying the deluge of reading into these three very simple steps. So, if you feel ready, go off and try it! It is all kinds of magical. If you feel like you need more information and just a few more tiny details, read on...

Scouring the Silk
Why it's important
Scouring is essentially cleaning your fabric. It removes impurities, like oils, wax, or anything added during processing, from the fabric so that the dye can adhere better. You can use a special pH-neutral wash like Eucalan, but I simply used a natural dish soap.
How to Scour
To calculate the amount of soap I would need, I simply weighed all of the fabric I would be using on my kitchen scale and then took 3% of that number. I then weighed out the soap on my scale and added it to the pot of water. I ran the water as hot as my tap would allow, then added the silk and let it soak for an hour, after which I rinsed it thoroughly.
*Use whatever size pot will comfortably contain your fabric and enough water that it will be submerged and move around freely.

Mordanting the Silk
Why it's important
Mordanting helps the silk form a chemical bond with the dye, resulting in richer, more vibrant colors. I did another silk dying project a couple of months earlier with much less satisfactory results, and, as a now amateur mordanting expert, I wonder if it was because I failed to mordant. Regardless, I was determined to do it right this time, so I made sure to follow all of the steps.
A Note on Mordanting
Different fabric families– those with cellulose fibers, think cotton and linen, or protein fibers, like silk or wool, require different chemicals for mordanting. Within each family, there are multiple options for each type of fabric, so, you can imagine how overwhelming things can get for beginners. To try and keep this simple and to the point, I am sticking only with the information necessary for dying silk using alum. It worked great, so feel free to save yourself the trouble of a deep dive.

How to Mordant
Since I already knew the weight of my fabric, I calculated 10% of that weight to determine how much alum I needed. I added this amount of alum to a pot of fresh hot water (same pot from scouring, rinsed and refilled), swirled until it was completely dissolved, added my fabric, and set it to a low simmer.
Now, if you aren't following my concise advice and are gathering your information from multiple sources, you may find recommended soaking times that run the gamut. But, in our experience, a scant 2 hours (I was on a strict snack deadline at the time) worked perfectly. Followed by a careful, because your silk will be hot, rinsing in cool water. And now we were ready for the fun part!

Marigold Dye Bath
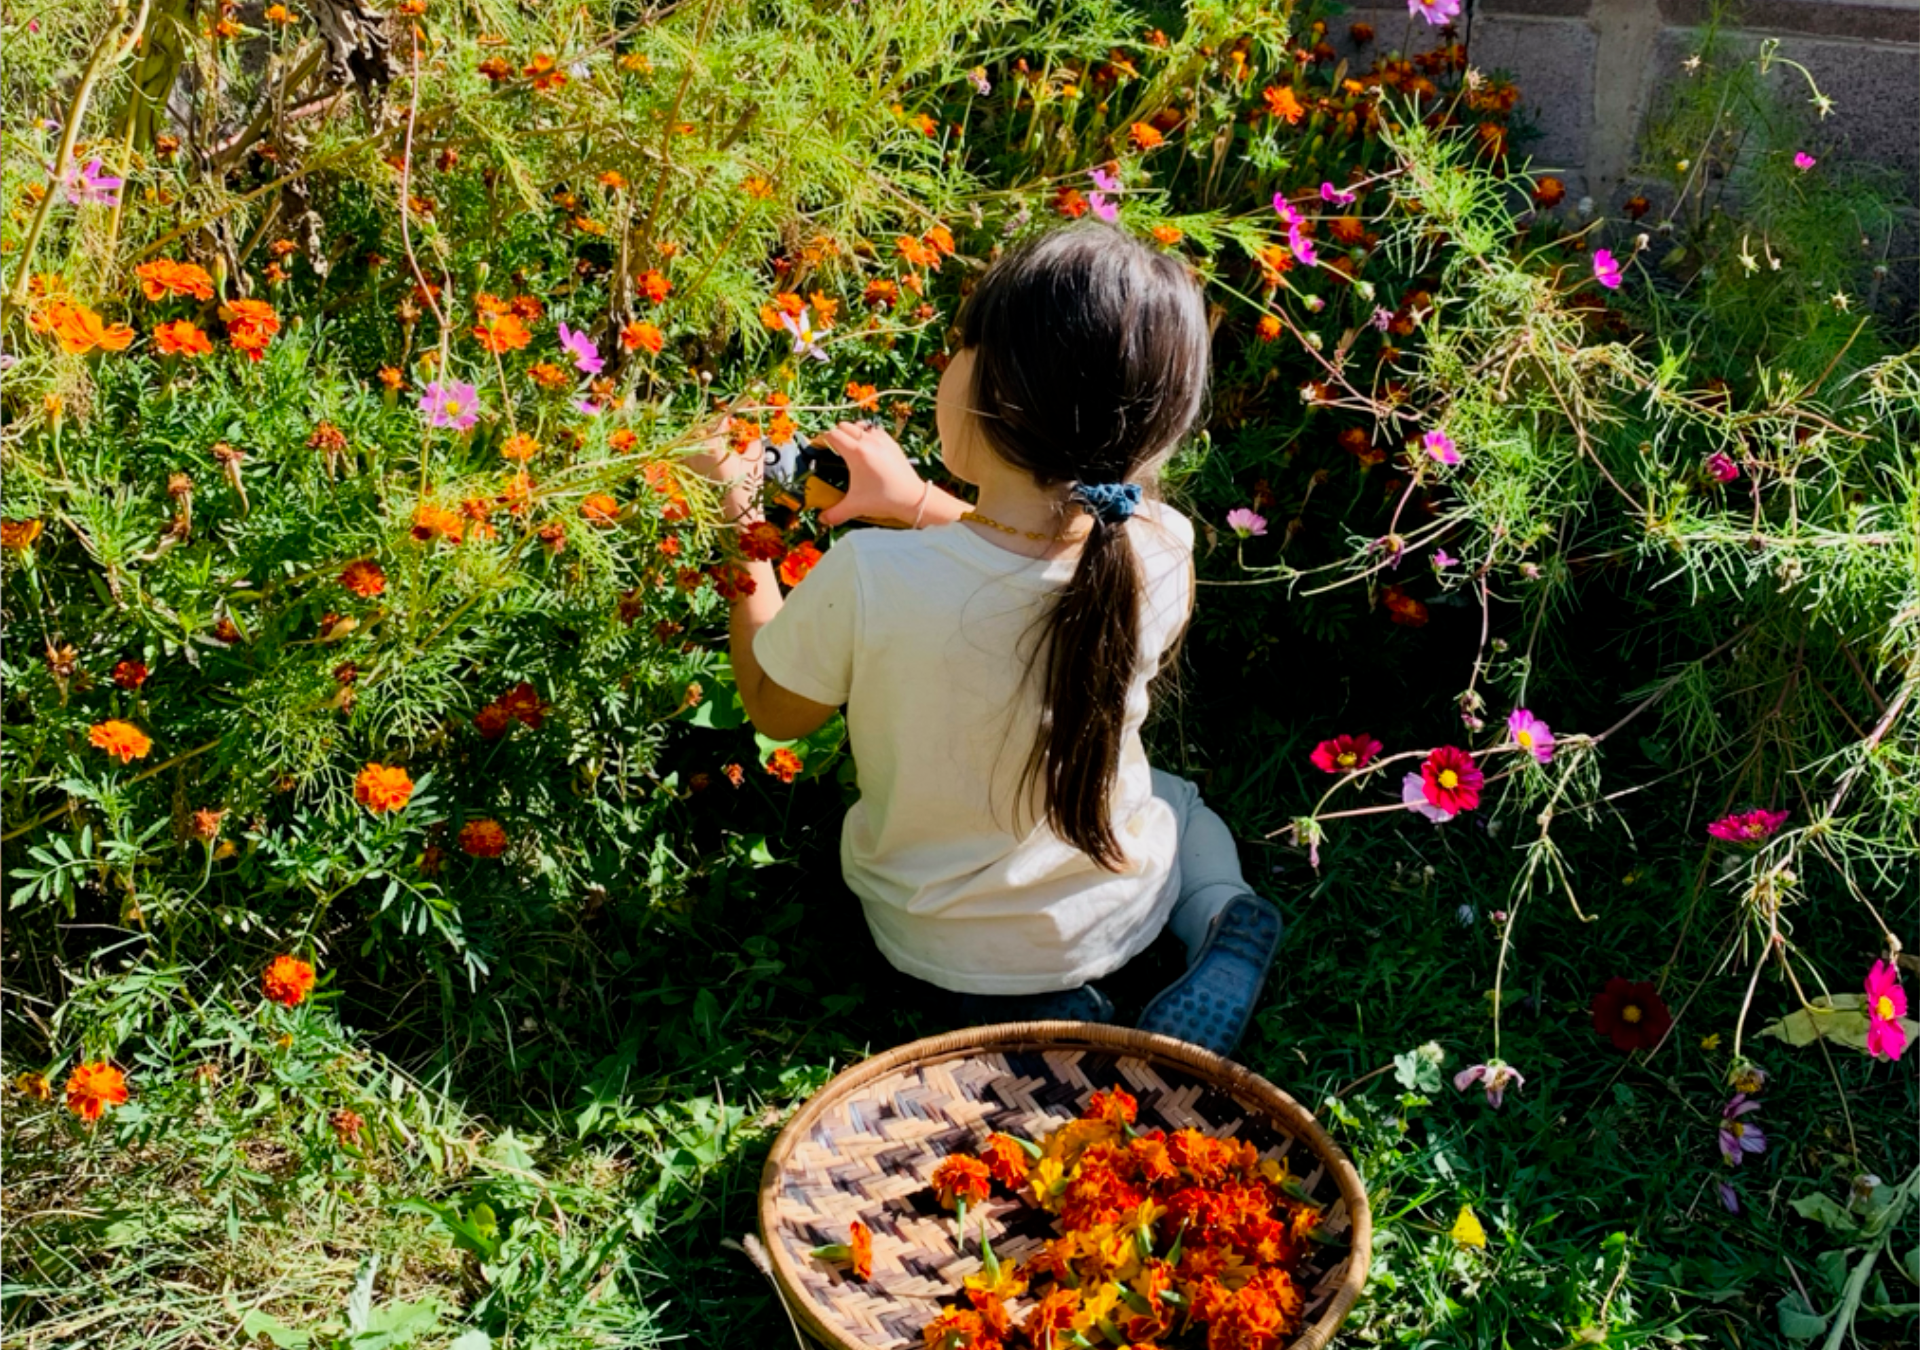
One of my favorite things about this project is that we were able to pick the marigolds that we've been growing all year, right from our own backyard; from seed to silk, a dream in itself.
How to Make Marigold Dye
You probably need fewer flowers than you think. We gathered about 20-30, not huge, flowers. The children then worked to pull all the petals out and add them to the final pot of fresh (again) water, seeds and all, though the stems were discarded. Then the pot was put back on the stove to simmer.
 After half an hour, each child added their silk to the pot and gave it a little stir. I kept the pot on very low heat to ensure that the dye stayed warm and let it soak for a full hour (maybe even slightly longer, I reeeeally wanted it to work), stirring every so often.

The Reveal!
Of course, this was the most exciting part. After the silks had their full soak, they needed one more rinse and would be ready. I picked off as many flowers as I could before rinsing them in cool water. If you're able to do this project outside, I highly recommend letting the silks cool off a bit (they cool quite quickly) and then letting the children rinse them themselves so they can witness the full magical transformation that they just created with their own hands!
 Because of the prepping, the silks, once dyed, are color-fast and washable as usual. But as with all dyes, some fading should be expected and will be exacerbated by excessive washing or if they’re left in direct sunlight for long periods of time.
And that's a wrap on the most magical project we've ever done! There is so much room for experimentation, different amounts of flowers, different soak times, and just think of the amazing gold and white tie-dye creations you could make!
 I hope you all give dying with marigolds a try! It is perfect for this time of year, when marigolds are prolific and you just can't get enough of that rich gold color. It may sound overwhelming at first, but I hope my simple recipe helps make it more approachable. Also, since much of the time commitment is hands-off, you can {relatively} easily do this project at home while you have other things going on.
While I did do this as an activity planned for my children, it is absolutely a magical project for all ages, and I think it is safe to say that I enjoyed it the most :)